
This post teaches you to reduce the size of photos using the program IrfanView, a free program, small, that works like a Swiss Army knife when it comes to image manipulation.
This program does a lot beyond just resize an image, but the focus of this post is just to demonstrate this functionality. Then you can explore the program and see the thousands of other features available.
Let's cut to the chase. First we download, Install and open the program. Follow the below step-by-step:
How to download IrfanView
1. Log in: www.irfanview.com;
2. Click on the left side: “Download”;
3. Select any link available at.
The most current version is 4.33 and is 1.5 MB.
How to download the language pack Portuguese – Brazil do IrfanView
If you want to work with the program in English language, Follow the instructions below. I always prefer to use the English version.
1. Log in: www.irfanview.com;
2. Click on the left side: “IrfanView languages”;
3. Select the link “Install” in: “Portuguese-Brazil (help file included) Installer or ZIP”.
're Too lazy to follow the step-by-step? Then just download here this file.
Installing IrfranView
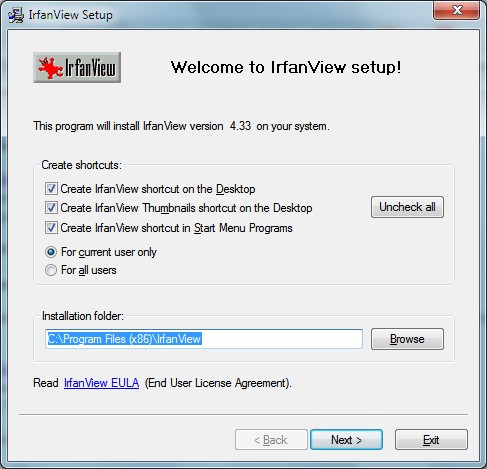
Installation is very simple. When running the installation file of the program, the screen below is displayed:
1. I recommend to leave the default settings shown in the screen below. Click “Next >”;
2. A screen appears with the improvements of version. You can click “Next >”;
3. This screen is for you to select which file extensions that would be associated by IrfanView. As also really like this program and image viewer, I suggest you choose “Images only” and then click “Next >”. If not please so, just click “None” and then “Next >”;
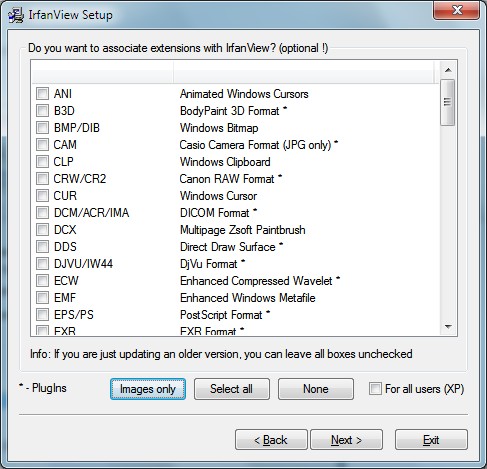
4. The next screen you can leave as default and proceed by clicking “Next >”;
5. Soon. Now let's learn how to use the program to resize the photo.
Redimensionando a photo
1. Open IrfanView and select the photo you want to resize. Menu “File”->”Open”;
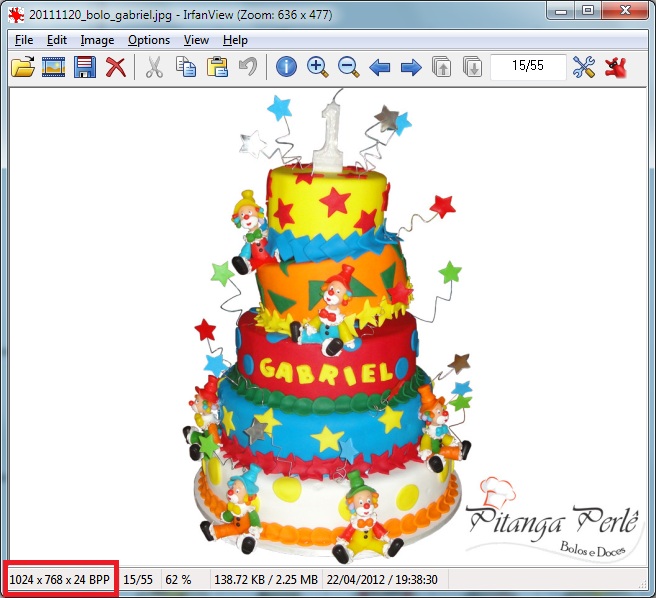
2. Notice that the example photo is the size of 1024 pixels per largura 768 pixel height. The desire is to resize it to 600px wide and any height proportional value;
3. Go menu “Image” and select “Resize/Resample”, or simply press “Ctrl R”. The screen below is displayed:
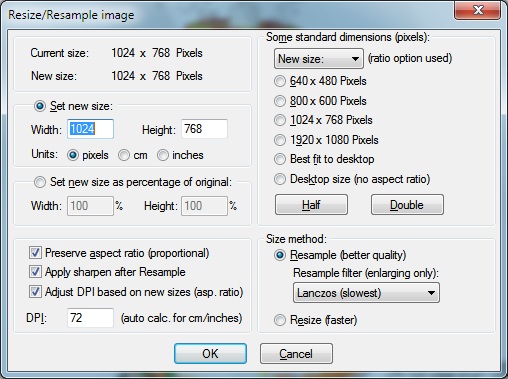
4. In “Set new size”->”Width”, enclose the value 600 and note that the option “Height” Automatically changes value. This is because the option “Preserve aspect ratio (proportional)” below is already selected.
5. Done that, click “OK”.
6. Now just save the photo. Click on the menu “File” -> “Save as…”, or simply press the letter “S”. The screen below is displayed:
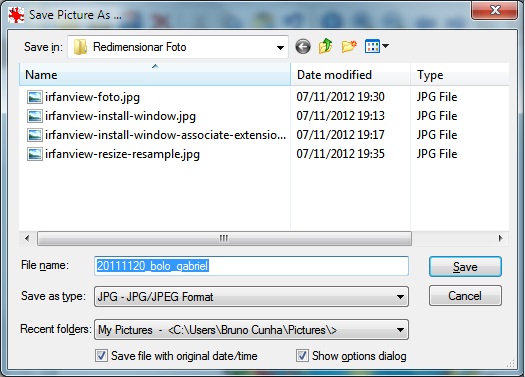
7 . In option “Save as type”, select a file type. Sugiro that selecione “JPG – JPG/JPEG Format”.
8. Choose the name and location where the file is saved and click “Save”.
Soon. That's it. Now you have learned to resize a photo to any size you want.
Got any questions? Comment here in the post to try to help.


Pingback: How to optimize images for the Internet